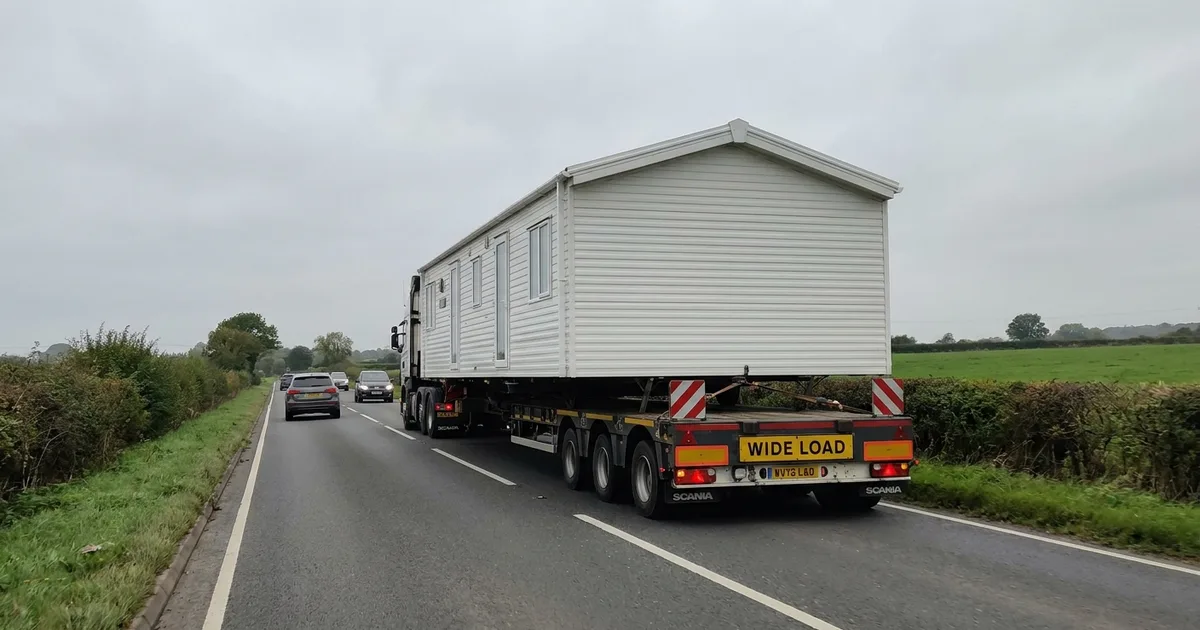
Your static caravan is 3 to 4.3 metres wide. The legal limit for towing on a UK road without special authorisation is 2.55 metres. That gap is the entire reason this move needs a specialist haulier, an abnormal-load notification, and a plan. Not a man with a trailer and a free Saturday.
So if you came here looking for the DIY shortcut, there isn’t one. Learning how to move a static caravan is really about understanding a professional abnormal-load haulage job, because your caravan is already over the legal road width the moment it leaves the pitch. It is not a towing job and never was. What makes it manageable is that the whole thing breaks into seven predictable steps, and none of them is a mystery once you can see it laid out.
There are seven distinct steps between deciding to move and having the caravan reconnected on its new pitch. This guide walks through what actually happens at each one, so you know what a specialist is doing on your behalf and can tell a good quote from a bad one. Read it once, then use it as a working checklist.
How to Move a Static Caravan: The 7 Steps at a Glance
Here is the whole move in one box. Screenshot this and you have the entire process on one screen.
- Check permissions at both the park you’re leaving and the one you’re joining.
- Confirm your caravan is fit to move on size, weight and condition.
- Book a specialist transporter and compare what each quote actually covers.
- Plan the route and permits, handled by the transporter through ESDAL.
- Disconnect utilities and prep the interior and exterior.
- Move on transport day, with loading, transit and a crane lift where access is tight.
- Re-site and reconnect the caravan on its new pitch.
Here is what each step actually involves, starting with the one people assume is optional.
Step 1: Check Permissions at Both Ends
Moving a static caravan is an admin job before it is a transport job. Most people think only the destination park’s approval matters. Both ends have to say yes, in writing, before anything gets booked.
Leaving a park typically means getting written confirmation from the site manager and giving roughly 28 days’ notice. That figure varies by park, so check your own site licence or pitch agreement rather than assuming a blanket number applies to you. Some parks want longer, some tie notice to the end of a licence year.
The destination site has to actively accept the caravan too. Some parks restrict the age or make of units they’ll take onto a pitch as a “bring-on”, so a caravan that’s fine to move might still be turned away at the gate. Confirm acceptance in writing before you spend a penny on haulage.
Remember that as an owner you own the structure, not the land it sits on. You stay bound by both parks’ rules and pitch-fee terms throughout the move. If you want more detail on the legal and planning side of leaving or joining a park, our static caravan planning permission guide covers it in full.
Once both ends have said yes on paper, the next question is whether the caravan itself is actually fit to make the journey.
Step 2: Confirm Your Caravan Is Fit to Move
Get the numbers straight before you request a single quote. Industry sizing guides put standard static caravans at 28 to 40ft long and 10 to 14ft wide, which is 3.0 to 4.3 metres. Twin-unit models go up to 20ft, or 6 metres, wide. Weight is typically 5 to 12 tonnes, depending on the model and its fixtures.
Set those figures against the UK road-width limit of 2.55 metres and the point makes itself. Essentially every static caravan exceeds it. That is precisely why you can’t hire a generic van and trailer and do this yourself, and why every quote you receive will assume specialist abnormal-load haulage. This is the same reason the question “can you move a static caravan yourself?” has a one-word answer.
Condition matters as much as dimensions. Age, structural wear, and whether the unit has been moved before all affect whether a transporter quotes it as a standard job or flags extra handling. An older caravan that has sat on the same base for fifteen years needs a closer look than a two-year-old unit. Be honest about the caravan’s state when you ask for a price, because it changes the plan.
With size and condition confirmed, it’s time to book the specialist who’ll handle everything from here.
Step 3: Book a Specialist Transporter
This is the step that turns a plan into a booking, so it’s worth knowing what a proper quote looks like. A genuine specialist quote already assumes abnormal-load status. If a quote makes no mention of route permits or the possibility of an escort, treat that as a red flag rather than reassurance. It usually means the operator hasn’t priced the job properly and the gap will land on your bill later.
When you compare quotes, look past the headline number at three things. First, the insurance cover for the move itself, and what it pays out if the worst happens in transit. Second, whether crane or tractor access is included or charged separately, because that single item can swing the total. Third, who handles the ESDAL notification to police and highways. The answer should always be the transporter, never you.
For context, UK haulage runs roughly £600 to £4,500, with most jobs starting from around £950 and per-mile rates of about £2.50 to £3.00 depending on width. That is haulage only, not the full picture. We keep the detailed numbers in our static caravan moving cost guide rather than repeating them here. You can see exactly what our own service covers on our static caravan transport page.
Once you’ve booked, the transporter takes over the part almost nobody explains properly: the paperwork that gets your caravan legally onto the road.
Step 4: Route Planning and Permits, ESDAL Explained Simply
ESDAL stands for Electronic Service Delivery for Abnormal Loads. It is the national system hauliers use to notify police, highways authorities and bridge or utility owners about a route, all in one submission, instead of contacting each police force separately. When a transporter says they’ll “handle the ESDAL,” this is what they mean.
For loads between 3.0 and 5.0 metres wide, at least two clear working days’ notice is required. That’s a useful rough lead time to expect before your moving day is locked in. It’s also why a good transporter won’t promise you a same-week slot on a whim.
There is no single UK-wide width at which a police or professional escort becomes mandatory. It varies by force and even by road. Nottinghamshire Police, for example, allow loads up to 4.3m unescorted on three named A-roads but only 4.12m elsewhere, while Northumbria Police set their threshold at 5.0m. Anyone quoting you one universal escort figure is guessing. The full detail is on Nottinghamshire Police’s abnormal loads page.
Your practical takeaway is simple. Ask your transporter upfront whether your caravan’s width will need an escort, because that answer affects both cost and timing. All of this is the transporter’s job, not yours. Understanding it just lets you sanity-check their timeline and their quote instead of taking both on faith.
With the route and permits sorted, attention turns back to the caravan, because it needs to be physically ready before the low-loader arrives.
Step 5: Disconnect Utilities and Prep the Caravan
Nothing gets loaded until the caravan is dead. Gas, electric, water and waste all need a professional to disconnect them, and here is the catch most people miss: that job is almost always booked separately from the haulage, not folded into it. So pin down who is doing the disconnection and on what day, because a low-loader crew arriving to a still-live caravan means a wasted slot and a rebooking fee.
Inside, secure or remove anything loose. Furniture, fittings and any items that could shift in transit will damage the interior if they’re left to slide around on the road. A caravan travels better empty and locked down than full and hopeful.
Outside, the skirting, steps and any awnings or add-ons typically come off before the unit can be loaded. This is also the moment to note anything that was fitted on-site, because it all has to go back on at the other end. Photograph how things sit now if it helps you rebuild later.
With the caravan disconnected and prepped, everything now points at transport day, the part of the job people picture when they imagine what can go wrong.
Step 6: Transport Day: Loading, Transit, and the Crane Lift
This is where a static caravan move stops being paperwork and becomes an operation. The unit travels on a flatbed or hydraulic low-loader trailer pulled by an HGV. Nothing moves an inch until the caravan is winched aboard and locked down with straps and chocks at every corner, and a good crew walks the whole rig checking each strap before the wheels turn.
The day starts with the low-loader easing into position, often reversing the full length of a pitch road that was laid out for family cars, not an articulated HGV towing a trailer wider than the lane. Where the pitch is tight, narrow turns, soft or uneven ground, a wall or hedge in the swing path, a crane or tractor does the lifting instead. That is the moment the whole job lives or dies on how much clearance the driver has to work with, and it is often measured in inches, not feet. This is exactly the part every insurer and magazine guide covers thinly or skips altogether, and it’s the part that most often decides whether a move goes smoothly.
A crane lift is the most technical and highest-risk moment of the entire job. The caravan is slung and lifted clear of the ground, swung into position, and set down with very little margin. That’s why it’s usually priced and scheduled separately from straightforward road transport, and why you were told back in Step 3 to check whether crane access was included. If your pitch is tight at either end, this is the line item to pin down before the day arrives.
Transit itself is the calm bit by comparison: a slow, planned run along the cleared route, sometimes with an escort ahead. If you want the fuller logistics breakdown of how the load is planned and moved, our static caravan transport guide goes deeper into that side of the job.
Once the caravan arrives, the job isn’t finished until it’s actually sited and reconnected.
Step 7: Re-Siting and Reconnecting at the New Pitch
Delivery is not the same as done. The caravan needs positioning and levelling on the new pitch base before anything else happens, and this is usually part of the transporter’s scope rather than a separate job. Confirm it’s included in the quote you agreed back in Step 3, so you’re not left with a caravan sitting off-level on a fresh base.
Utility reconnection mirrors the disconnection step. Gas, electric, water and waste are usually reconnected by local tradespeople rather than the haulier, so line those up to follow closely behind the delivery. A day’s gap here is fine. A week’s gap means a caravan you can’t use.
Finally, the skirting, steps and any add-ons you removed in Step 5 get refitted once the unit is settled on its new base. At that point the move is genuinely complete, and the caravan is livable again.
That’s the full process end to end. Here’s the checklist version to keep on hand.
The Static Caravan Moving Checklist
This is the whole move stripped down to actions. Screenshot it and work through it top to bottom.
- Confirm your leaving-park notice period in writing.
- Confirm the destination park accepts your caravan’s age and make.
- Check your caravan’s width, length and weight against the 2.55m road limit.
- Get transporter quotes that include ESDAL notification and insurance cover.
- Ask whether your caravan’s width will need a police or professional escort.
- Book utility disconnection at the current pitch.
- Prep the interior and remove skirting, steps and add-ons.
- Confirm crane or tractor access if either pitch is tight.
- Confirm levelling and siting are included in the transporter’s quote.
- Book utility reconnection at the destination.
Work that list and there are no surprises left. Every item on it is something you now understand, not something you’re taking on trust.
Ready to Get a Quote
You now know what a static caravan move actually involves, what a proper transporter quote should cover, and which questions separate a specialist from a chancer. That makes you a more confident buyer, not a more anxious one.
When you’re ready, the natural next step is Step 3. Tell us your caravan’s width and both postcodes and we’ll come back with a clear quote that already includes the permits, notifications and escort arrangements this guide has walked you through. Get a free quote from Static Caravan Movers UK and move your caravan the right way.